TL;DR:
- Proper surface preparation, including flatness testing and moisture control, is essential for durable bathroom tile installation. Waterproofing using liquid or sheet membranes protects the structure from water damage and mold, with flood testing confirming leak prevention. Following correct sequencing in tile setting, grouting, sealing, and avoiding common mistakes ensures a lasting, professional-quality finish.
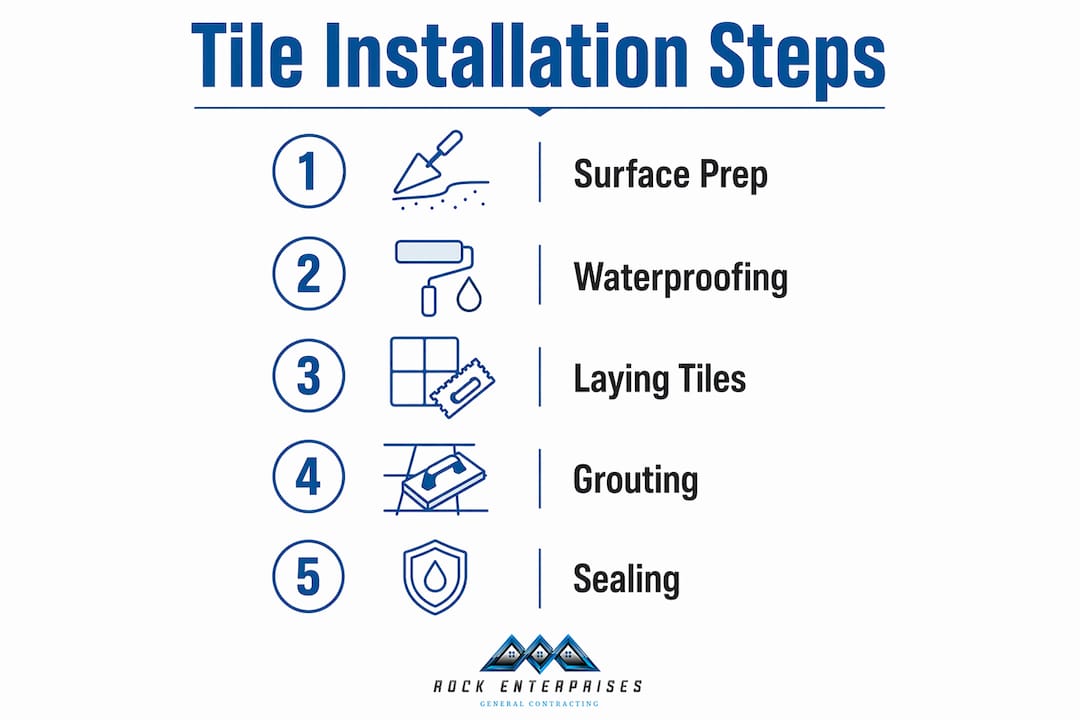
Bathroom tile installation is the process of securely adhering tiles to walls and floors using surface preparation, waterproofing membranes, thin-set mortar, and grout to create a durable, water-resistant finish. Understanding how bathroom tile installation works before you pick up a trowel saves you from costly mistakes like cracked tiles, mold behind walls, and failed adhesive bonds. This guide walks you through every stage, from checking your substrate to sealing the final grout joint, with the same techniques used by licensed contractors at Rockenterprisecontracting in Monmouth and Ocean County, NJ.
What surface preparation is needed before tile installation?
Surface preparation is the single most important step in any tile job. Skip it, and even the most expensive tiles will crack, pop, or shift within months.
Check flatness and fix low spots
Surface flatness must not deviate more than 3mm over a 2-meter span. Anything beyond that causes lippage, which is the visible height difference between adjacent tiles that makes a floor look uneven and creates a trip hazard. Use a long spirit level or a straightedge to identify high and low spots, then apply a self-leveling compound to bring the floor into tolerance.
Remove old tile and damaged substrate
Old tile must come off completely before new tile goes down. Tiling over existing tile adds weight and height, and any loose or hollow spots underneath will telegraph through the new installation. Use a floor scraper and cold chisel to remove old adhesive residue. If the cement board or drywall underneath is water-damaged or crumbling, replace it before moving forward.
Test for moisture
Moisture vapor emission rates over 5 lbs/1,000 ft²/24hr require a moisture barrier membrane or primer before tiling. High moisture causes adhesive to break down and tiles to debond over time. A digital moisture meter gives you a reading in seconds. If your subfloor reads high, apply a moisture-blocking primer like RedGard or a sheet membrane before laying any adhesive.
Prime porous surfaces
Concrete and cement board absorb moisture from thin-set mortar too quickly, which weakens the bond. Apply a diluted acrylic primer to porous surfaces and let it dry fully before tiling. This step takes 30 minutes but adds years to your installation.
- Use a spirit level and 2-meter straightedge to check flatness
- Apply self-leveling compound to any deviation over 3mm
- Test subfloor moisture with a digital moisture meter
- Prime porous surfaces with an acrylic bonding primer
- Replace any water-damaged cement board or drywall
Pro Tip: Run your straightedge diagonally across the floor, not just parallel to the walls. Diagonal checks catch dips that straight checks miss.
How is waterproofing applied to protect bathroom tile?
Tile and cement grout are porous, which means water passes through them and reaches the substrate behind. Waterproofing is the barrier that stops that moisture from rotting framing, feeding mold, and destroying your subfloor. This step is non-negotiable in any wet area.
Liquid vs. sheet membranes
| Feature | Liquid Membrane (e.g., RedGard) | Sheet Membrane (e.g., Schluter Kerdi) |
|---|---|---|
| Application | Brush or roller, 2 coats | Embedded in thin-set with fabric |
| Best for | Floors, irregular shapes | Shower walls, niches, corners |
| Drying time | 1–4 hours between coats | Ready after thin-set cures |
| Cost | Lower material cost | Higher material cost, faster install |
| Skill level | Beginner-friendly | Moderate skill required |
Liquid membranes like RedGard work well on floors and oddly shaped areas because they conform to any surface. Sheet membranes like Schluter Kerdi bond directly into the thin-set layer and are preferred by professionals for shower walls because they create a continuous, seam-free barrier.
Coverage requirements
Shower walls need waterproofing from the pan up to at least 6 inches above the shower head. The floor pan needs full coverage, including 6 inches up every wall. Corners and seams get an extra layer of fabric mesh tape embedded in the liquid membrane before the final coat goes on.
Flood testing the shower pan
Flood testing the shower pan with water for 24 hours is the professional standard for catching leaks before tile goes down. Plug the drain, fill the pan to the curb height, mark the water level with tape, and check it 24 hours later. Any drop in water level means a leak that must be fixed before tiling.
Pro Tip: Apply a second coat of liquid membrane at all inside corners and seams. These are the highest-stress points in any shower and the most common source of leaks.
What are the key steps to laying bathroom tiles?
The tile-setting process follows a specific sequence. Skipping steps or changing the order creates problems that are expensive to fix after the adhesive cures.
- Find your center lines. Measure the room and snap chalk lines at the center of each wall. These lines are your reference points for the entire layout.
- Dry-lay the tiles. Tile experts identify the dry-lay process as the most effective way to prevent awkward cuts and wasted tile. Lay tiles out without adhesive from the center lines to the walls to see how the pattern works and where cuts will fall.
- Mix thin-set mortar. Combine polymer-modified thin-set with water until it reaches a smooth, peanut butter consistency. Let it slake (rest) for 10 minutes, then mix again before use.
- Apply thin-set with a notched trowel. Hold the trowel at a 45-degree angle to create uniform ridges. The notch size depends on tile size: a 3/16-inch V-notch for small mosaic tiles, a 1/2-inch square notch for tiles over 12 inches.
- Back-butter large-format tiles. Back-buttering is required for tiles larger than 300×300mm to achieve 85–95% adhesive coverage. Spread a thin layer of thin-set on the back of the tile before pressing it into the bed on the floor. This eliminates hollow spots that crack under foot traffic.
- Set tiles with a slight twisting motion. Press the tile firmly into the thin-set and give it a small twist to collapse the ridges and create full contact. Check with a spirit level after every 3–4 tiles.
- Insert tile spacers. Use plastic tile spacers at every corner to maintain consistent grout joint width. Standard joints are 1/16 inch for rectified tiles and 1/8 inch for standard tiles.
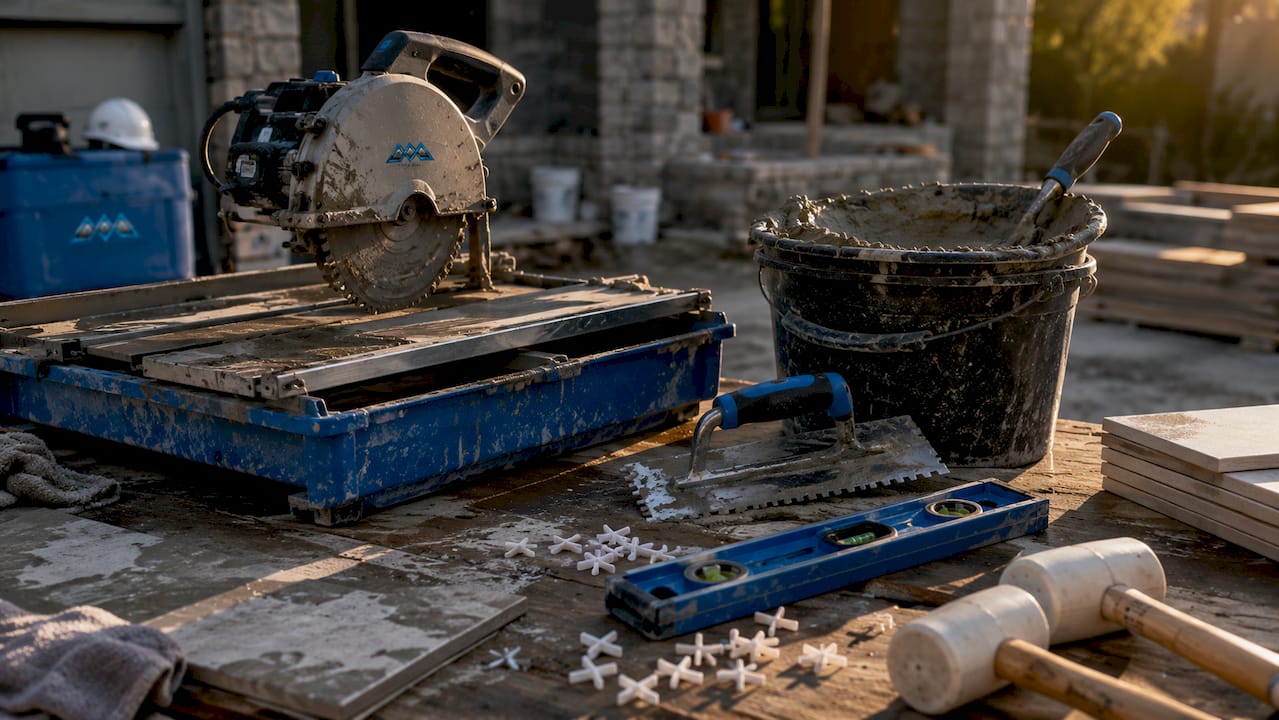
- Cut tiles with a wet saw. A wet saw with a diamond blade makes clean, precise cuts on ceramic, porcelain, and natural stone. Tile nippers handle small curves around pipes and fixtures.
Tools you need: wet saw, notched trowel, tile spacers, spirit level, rubber mallet, and a bucket for mixing.
Pro Tip: Check your layout for “slivers,” which are cuts smaller than half a tile at the walls. Shift your center lines by half a tile width to avoid them.
How to grout, seal, and finish bathroom tile properly
Grouting is where a tile job either looks professional or amateur. The difference comes down to timing, consistency, and the right product for the application.
Choose the right grout
Cementitious grout is the standard choice for most bathroom applications. It comes in sanded and unsanded versions: sanded for joints wider than 1/8 inch, unsanded for narrower joints. Epoxy grout is harder, stain-resistant, and waterproof, making it the best option for shower floors and areas with heavy moisture exposure. Epoxy grout costs more and requires faster work because it sets quickly.
Apply grout correctly
Mix cementitious grout to a toothpaste consistency, neither too wet nor too stiff. Apply it with a rubber grout float held at a 45-degree angle, pressing grout diagonally across the joints to pack them fully. Work in 4-square-foot sections to stay ahead of the set time.
- Remove tile spacers before grouting begins
- Apply grout diagonally across joints with a rubber float
- Wipe excess grout with a damp sponge in a circular motion
- Clean grout haze at the right time to avoid stripping joints or leaving residue that requires abrasive scrubbing
- Buff the tile surface with a dry cloth after the haze dulls
Seal and use silicone at joints
Seal cementitious grout lines with a penetrating grout sealer after the grout cures for at least 72 hours. This prevents moisture and staining from penetrating the grout. At inside corners, floor-to-wall junctions, and around fixtures, use flexible silicone sealant instead of grout. Grout cracks at these movement joints because the wall and floor flex independently. Silicone moves with the structure and stays watertight. Wait at least 24 hours after grouting before exposing the installation to water, and 72 hours before full shower use.
What common mistakes should you avoid in tile installation?
Most tile failures trace back to a small number of predictable errors. Knowing them in advance keeps your project on track.
- Never use mastic adhesive in wet areas. Pre-mixed mastic re-emulsifies with moisture, causing tiles to slide and fail. Always use polymer-modified thin-set in bathrooms.
- Fix uneven tiles immediately. You have a window of about 20 minutes after setting a tile to adjust it. After that, the thin-set begins to skin over and the bond weakens if you move the tile.
- Do not skip the dry-lay phase. Jumping straight to adhesive without a dry layout leads to awkward half-inch cuts at the most visible walls.
- Rent tools rather than buy them. A wet saw rental costs $40–$60 per day at Home Depot or Lowe’s. Buying one for a single bathroom project rarely makes financial sense.
- Wear eye protection and knee pads. Tile cutting throws sharp fragments. Working on a hard floor for hours without knee protection causes real injury.
DIY vs. professional cost comparison
DIY bathroom tiling can cost under $500 in materials for a standard bathroom, while professional labor often exceeds $1,400 for the same space. That gap is real, but it assumes you have the time, patience, and physical ability to do the work correctly. A botched DIY job that needs professional repair costs more than hiring a contractor from the start. If you are unsure about waterproofing or working with large-format tiles, get at least one professional quote before committing. You can learn more about comparing contractor quotes to make sure you are evaluating bids fairly.
For design inspiration before you finalize your tile selection, the bathroom tile design workflow at SurfacesGalore walks through layout concepts and pattern choices that affect both the look and the complexity of your installation.
Key takeaways
Successful bathroom tile installation depends on surface preparation, correct waterproofing, proper adhesive selection, and precise grouting to produce a finish that lasts decades.
| Point | Details |
|---|---|
| Surface prep is non-negotiable | Flatness within 3mm over 2 meters prevents lippage and bond failure. |
| Waterproofing protects the structure | Apply liquid or sheet membranes in all wet areas before setting any tile. |
| Back-butter large-format tiles | Tiles over 300×300mm need adhesive on both surfaces to reach 85–95% coverage. |
| Use thin-set, not mastic | Polymer-modified thin-set is the only safe adhesive for wet bathroom areas. |
| Seal grout and use silicone at joints | Grout sealer prevents staining; silicone at corners prevents cracking from movement. |
What i have learned after years of bathroom tile work
After overseeing dozens of bathroom remodels across Monmouth and Ocean County, the pattern I see most often is homeowners who rushed the prep work and paid for it later. A floor that looks flat to the eye can still fail the 3mm tolerance test. A shower that looks waterproofed but skipped the flood test can leak for months before the damage shows up in the framing.
The tools matter less than the sequence. You can do excellent work with a rented wet saw and a $15 notched trowel if you follow the steps in order and give each stage the time it needs. Where I see DIY projects go wrong most often is not in the tile setting itself. It is in the two steps before it: substrate prep and waterproofing.
My honest recommendation is this: if you are comfortable with the prep and waterproofing stages, the tile setting is learnable. If those two steps feel uncertain, hire a professional for at least the waterproofing phase and do the tile work yourself. That split approach gives you real cost savings without the risk of structural water damage. The bathroom remodeling process involves more decisions than most homeowners expect, and getting the foundation right is always worth the extra day.
— ryan
Ready for a professional finish? Rockenterprisecontracting can help
Rockenterprisecontracting is a licensed, family-owned general contractor based in Shrewsbury, NJ, with a 5.0-star rating on Thumbtack and a 100% positive feedback score. The owner personally oversees every project, which means your bathroom tile installation gets the same attention on day five as it does on day one.

Whether you want expert tile installation services or a full bathroom renovation, Rockenterprisecontracting serves homeowners across Monmouth and Ocean County with transparent pricing and hands-on craftsmanship. Browse the completed renovation projects to see the quality of work firsthand, or reach out for a consultation and get a clear quote with no surprises.
FAQ
How long does bathroom tile installation take?
A standard bathroom tile job takes 3–5 days from surface prep to final grout sealing. Larger bathrooms or complex patterns with mosaic or large-format tiles can extend the timeline to 7 days.
What tools do i need to install bathroom tiles?
The core tools are a wet saw, notched trowel, rubber grout float, tile spacers, spirit level, and a rubber mallet. A digital moisture meter and straightedge are also needed for proper surface prep.
Can i tile over existing bathroom tiles?
Tiling over existing tiles is possible only if the current tiles are fully bonded, flat, and structurally sound. Any loose, cracked, or hollow tiles must be removed first, and the added height may affect door clearance and fixtures.
What is the best grout for a shower floor?
Epoxy grout is the best option for shower floors because it is waterproof, stain-resistant, and does not require sealing. Cementitious sanded grout works for drier areas but needs a penetrating sealer applied after curing.
How soon can i use the shower after tiling?
Wait at least 24 hours after grouting before any water exposure, and 72 hours before full shower use. Thin-set mortar under the tiles needs 24–48 hours to cure before grouting can begin.