
TL;DR:
- Bathroom demolition involves carefully removing fixtures, wall materials, and flooring to reveal underlying structures for renovation. Safety preparation, proper sequence, and final decisions prevent delays, hidden damage, and costly mistakes during the process. Hiring professionals ensures safety, quality, and a smooth start to the bathroom remodel.
Bathroom demolition is the process of carefully dismantling and removing all existing bathroom components to expose the underlying structure and utilities in preparation for renovation. What does the bathroom demo process involve at its core? It means stripping out fixtures, wall materials, and flooring down to the studs and subfloor so contractors can inspect what lies beneath. This investigative phase often reveals hidden water damage, outdated plumbing, or electrical issues that change the project scope entirely. A well-executed demo sets the foundation for every renovation step that follows, from waterproofing to tile installation.
What are the safety and prep steps before bathroom demo?
Safety preparation is the non-negotiable first step in any bathroom demolition. Skipping it creates serious risk to workers, the home’s structure, and the renovation budget.
The core safety checklist before demo day includes:
- Shut off water supply at both the main valve and individual fixture shutoffs to prevent flooding during pipe disconnection.
- Turn off electrical breakers serving all bathroom circuits. Never assume a switch controls the full circuit.
- Survey for hazardous materials if the home was built before 1980. Asbestos surveys are often mandated for older homes, and disturbing asbestos without proper abatement creates serious health and legal liability.
- Cap gas lines with a licensed plumber if any gas-fed fixtures exist in or adjacent to the bathroom.
- Pull permits from your local building department. Many jurisdictions require permits for full bathroom remodels, and inspections during demo protect you at resale.
- Protect adjacent areas by sealing doorways with plastic sheeting and laying plywood over hallway floors to prevent dust and debris from spreading.
- Document everything with photos and video before touching a single fixture. Photos of plumbing and electrical configurations before removal provide a roadmap for reconnection and reduce costly mistakes.
Pro Tip: Film a slow walkthrough video of all visible pipes, wires, and valve locations before demo starts. A two-minute video can save hours of guesswork during reinstallation.
Checking with your local building department early also tells you whether your specific demo scope triggers an inspection requirement. Some municipalities require a rough-in inspection after demo and before new materials go in. Missing that window can force you to tear out finished work.
What is the standard sequence in the bathroom demo process?
The bathroom remodel process follows a specific order of operations. Doing steps out of sequence damages materials you plan to keep or creates safety hazards.
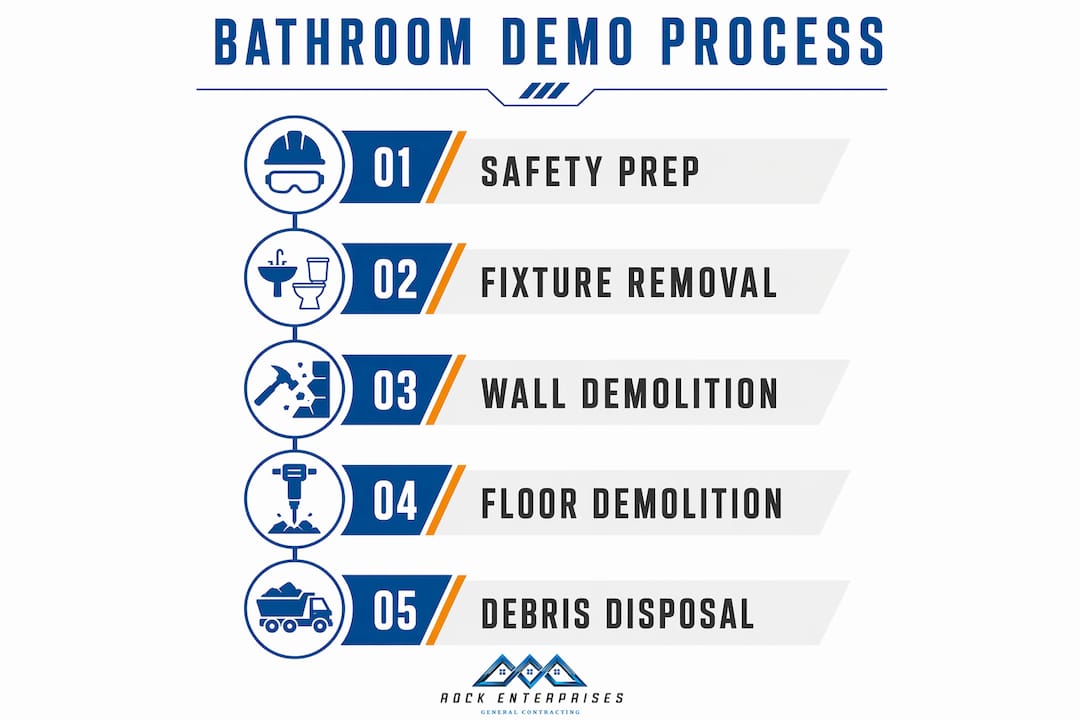
- Clear all personal items and accessories. Remove towels, toiletries, mirrors, and any wall-mounted hardware before tools come out.
- Disconnect plumbing fixtures. Turn off supply lines, then remove the toilet, vanity, and sink. Cap open supply lines immediately after disconnection.
- Remove the tub or shower unit. Freestanding tubs lift out. Built-in tubs often require cutting surrounding drywall first to free the flange.
- Take down lighting, exhaust fans, and electrical fixtures. A licensed electrician should handle any wiring that goes beyond simple fixture removal.
- Remove cabinets, shelving, and mirrors. Unscrew cabinets from wall studs rather than prying them off to avoid damaging the framing behind them.
- Demo wall materials. Standard demo sequence takes walls down to the studs for a full inspection of plumbing, electrical, and structural conditions. Use a utility knife to score drywall before breaking it with a flat bar to control debris size.
- Remove floor tile and subfloor if needed. Tile removal complexity depends heavily on installation method. Thin-set tile comes up faster. Traditional thick mortar beds add significant labor time and debris weight.
- Final debris removal and site cleanup. Bag and haul all material before the next trade arrives. A clean site prevents accidents and speeds the next phase.
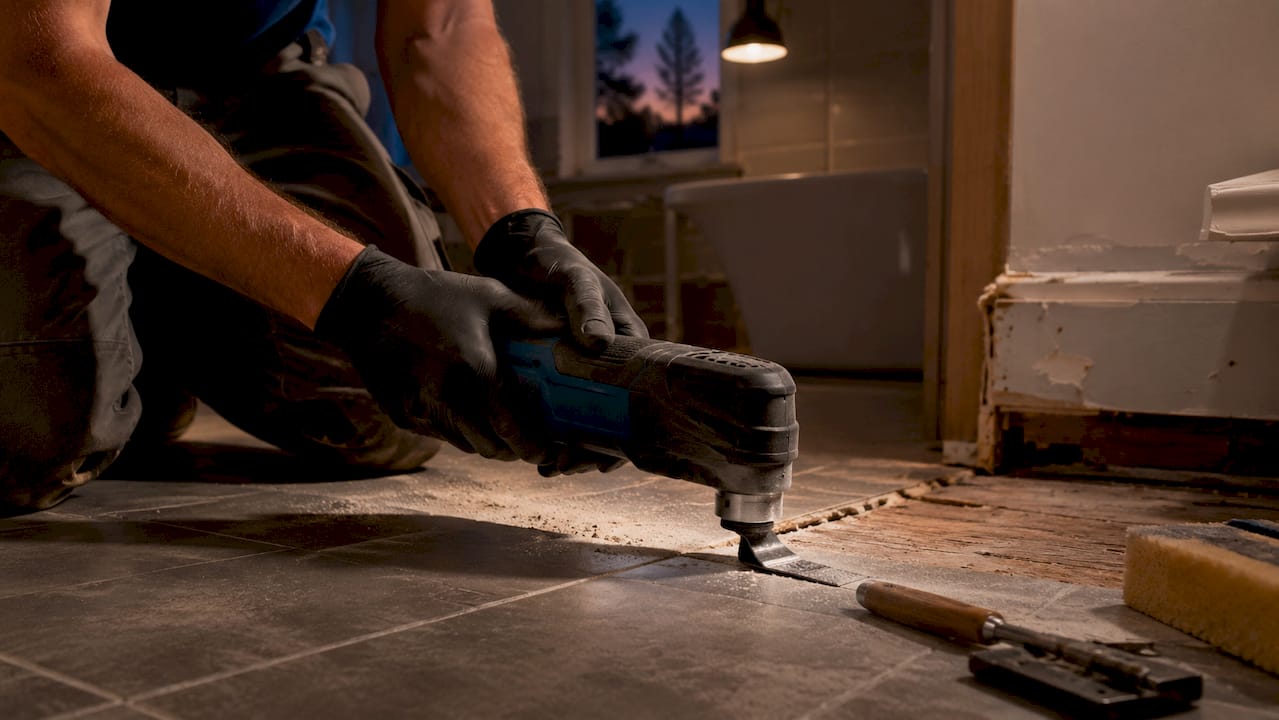
Pro Tip: Rent an oscillating multi-tool with a carbide blade for cutting around fixtures and scoring grout lines. Oscillating tools with carbide blades minimize damage to framing and subfloor compared to pry bars alone.
Removing materials all the way to the studs is not just about access. It lets you visually confirm that framing is square, plumbing is correctly positioned, and electrical meets current code. Skipping this step and leaving old drywall in place is a shortcut that creates problems during tile installation and waterproofing.
What hidden issues can bathroom demolition reveal?
Bathroom demolition functions as an investigative process that exposes concealed conditions defining the true scope of your renovation. What you find behind the walls often matters more than what you planned to change.
Common discoveries during demo include:
- Water damage behind walls and floors. Leaking supply lines, failed caulk joints, and cracked grout allow moisture to saturate drywall and wood framing for years before visible damage appears.
- Mold growth. Mold follows moisture. Remediation adds cost and time but cannot be skipped safely.
- Outdated or damaged plumbing. Galvanized steel pipes corrode from the inside. Polybutylene pipes, common in homes built from the 1970s through the 1990s, are prone to failure and often require full replacement.
- Electrical non-compliance. Older bathrooms frequently lack GFCI protection, proper circuit sizing, or adequate outlet placement per current National Electrical Code standards.
- Subfloor damage. Prolonged moisture exposure rots subfloor panels. Soft spots underfoot before demo often mean full subfloor replacement after demo.
“The most common cause of renovation delays is late decision making, not hidden damage discovered during demo. Finalizing your layout, waterproofing strategy, drain location, and material selections before demo day is the single most effective way to keep your project on schedule and on budget.”
Waterproofing decisions, drain location, and shower configurations must be locked in before demo starts. Changing the shower footprint or drain location after demo forces additional framing and plumbing work that multiplies labor costs. Homeowners who arrive at demo day with finalized selections move through the renovation steps far faster than those who treat demo as the time to start deciding. For a broader look at how these decisions affect your schedule, the bathroom renovation timeline guide from Rockenterprisecontracting breaks down each phase clearly.
How long does bathroom demo take and what does it cost?
Professional bathroom demolition typically takes between 1 and 2 days, depending on bathroom size, tile type, and fixture complexity. That timeline assumes a prepared site with utilities already shut off and permits in hand.
| Bathroom Type | Typical Demo Cost |
|---|---|
| Powder room | $400–$800 |
| Standard full bathroom | $800–$1,800 |
| Master bathroom with extensive tile | $2,000–$3,500 |
These cost ranges reflect professional labor and standard debris disposal. They do not include mold remediation or hazardous material abatement, which add cost based on the extent of contamination found. Mold remediation in a single bathroom can range from a few hundred dollars for surface treatment to several thousand for structural replacement.
DIY demo saves on labor but adds time and risk. Homeowners without experience with oscillating tools, flat bars, and proper debris containment often damage framing, crack subfloor panels, or disturb materials that require professional handling. Professional demolition crews maintain structural integrity and handle utilities correctly, reducing safety risks and keeping the project on schedule. For most full bathroom remodels, the cost difference between DIY and professional demo is smaller than homeowners expect once tool rental, debris disposal, and potential repair costs are factored in.
Tile type is the biggest variable in demo cost. Thin-set installations come up quickly with the right tools. Mortar bed installations, common in bathrooms built before the 1980s, require chipping through a thick concrete layer that adds hours of labor and significantly more debris to haul. Understanding your bathroom tile installation type before getting demo quotes helps you get accurate estimates.
Key Takeaways
Bathroom demolition is an investigative process that requires safety preparation, a defined sequence, and finalized design decisions before the first tool touches the wall.
| Point | Details |
|---|---|
| Safety prep comes first | Shut off water and power, survey for asbestos, and pull permits before any demo work begins. |
| Follow the correct sequence | Remove fixtures before walls, and walls before flooring to protect framing and avoid rework. |
| Expect hidden discoveries | Water damage, mold, and outdated plumbing are common finds that affect scope and cost. |
| Finalize decisions before demo | Locking in layout, waterproofing, and materials before demo day prevents costly change orders. |
| Professional demo saves money overall | Pro crews reduce structural damage risk and keep timelines tighter than most DIY efforts. |
What I’ve learned from watching homeowners approach demo day
The homeowners who struggle most with bathroom renovations are not the ones who find mold or bad plumbing behind the walls. They are the ones who arrive at demo day still deciding on tile sizes, shower configurations, or drain locations. Hidden damage is manageable. Indecision is expensive.
I have seen projects stall for two weeks after demo because the waterproofing system could not be specified until the homeowner chose their tile format. Large format tiles require different slope tolerances and drain placement than standard 4×4 tiles. That decision had to happen before the first wall came down, not after. The renovation was ready to move; the homeowner was not.
The other lesson I keep coming back to is documentation. Photographing and filming every pipe, wire, and valve before demo is not optional. It is the cheapest insurance you can buy on a renovation. I have watched reconnection take twice as long as it should because no one recorded where the hot supply entered the wall. A two-minute video prevents that entirely.
DIY demo is feasible for small, straightforward jobs, but the line between manageable and risky moves fast once you hit tile over mortar beds or discover that your 1960s bathroom has no GFCI protection and knob-and-tube wiring behind the vanity. Knowing when to call a professional crew is not an admission of defeat. It is the decision that keeps the rest of your renovation on track. You can review signs your bathroom needs professional help to know where that line sits for your specific situation.
— ryan
Rockenterprisecontracting handles bathroom demo the right way
Bathroom demolition done poorly creates problems that follow a renovation for years. Rockenterprisecontracting brings licensed, hands-on expertise to every demo phase, from utility shutoffs and hazardous material checks to careful fixture removal and structural inspection.

The owner personally oversees each project across Monmouth and Ocean County, NJ, which means nothing gets missed and no shortcuts get taken. Rockenterprisecontracting’s 5.0-star rating on Thumbtack reflects the kind of attention that turns a stressful demo day into a clean, organized start to your renovation. Explore the full range of personalized renovation services or see how a well-planned demo improves your bathroom remodel ROI before your project begins.
FAQ
What does bathroom demo involve at a basic level?
Bathroom demolition involves removing all fixtures, wall materials, and flooring down to the studs and subfloor to expose plumbing, electrical, and structural conditions before renovation begins.
How long does a standard bathroom demo take?
Professional demo typically takes 1 to 2 days for a standard full bathroom, assuming utilities are shut off and the site is prepared before work starts.
Do I need a permit for bathroom demolition?
Most full bathroom remodels require permits, and some jurisdictions mandate inspections after demo and before new materials are installed. Check with your local building department before starting work.
What hidden problems are commonly found during demo?
Water damage, mold, outdated plumbing, and electrical non-compliance are the most common discoveries, particularly in homes built before 1980.
Should I demo my bathroom myself or hire a professional?
DIY demo works for small, simple jobs, but professional crews reduce structural damage risk and handle utility and hazardous material issues correctly, often making them the faster and safer choice for full bathroom remodels.